|
Below are pictures and decriptions of several modification projects we've taken on, in the few months that we've actually
owned the camper.
Feel free to email us if you have specific questions about any of the projects.
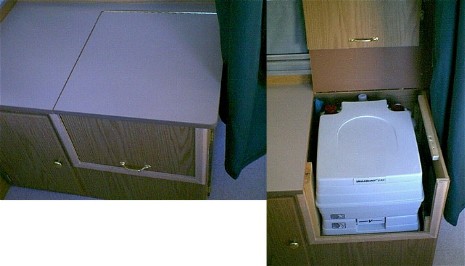
Built In Porta Potty- Both Sedona and Utah
Vagabond 240 purchased on Ebay. We decided to "build it in" for convinience. Blaise finished it off with some nice
trim work and a handle. Paper holder is inside the cabinet door next to the potty.
Refrigerator- Sedona
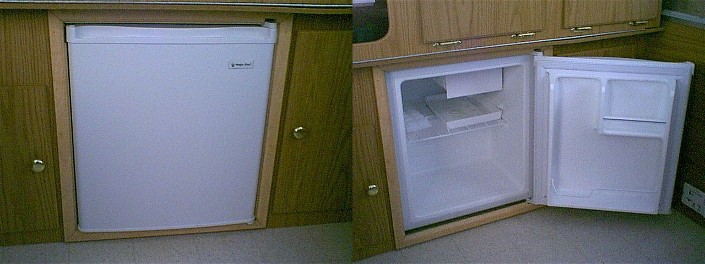
Regular Electric Refigerator
We figured we would be camping where we would have services, so for $70 we installed this
Magic Chef 1.8 cubic foot refrigerator. It's nice and cheap and does the trick. Blaise also installed another outlet next
to the sink under the cabinet to keep the cord hidden.
Higher Faucet- Sedona
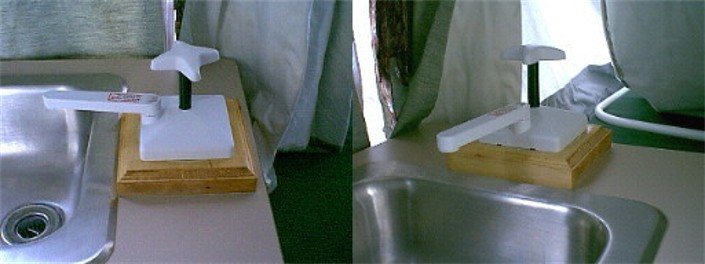
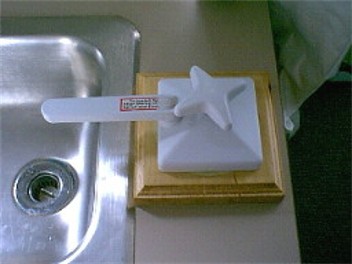
The block is one of those "rosettes" that are used in the corner of decorative molding. Blaise just cut out the center
circle, filled in with a bit of wood putty, stained it and set the faucet in.
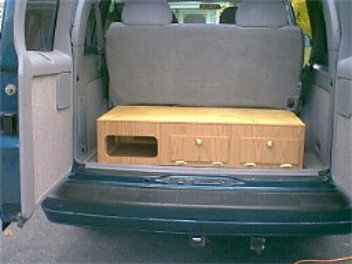
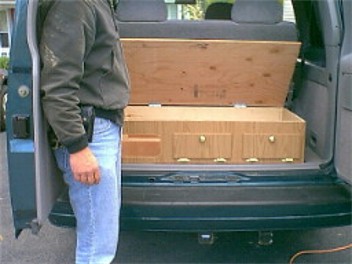
Tow Vehicle "Essentials" Modification
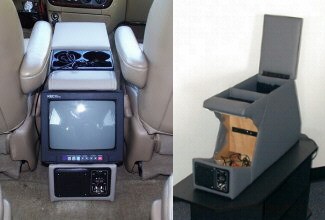
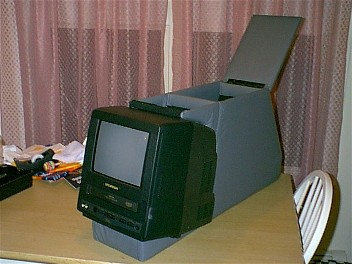
What better way to spend a long trip than to have the kids watching their favorite movies and, hopefully, not trying to kill
each other every 5 minutes?
The top picture shows the mini van console we purchased from Ebay, without a TV. The
gentleman was selling the consoles empty. Since Blaise needed something to put his stuff in, in the van, we bought the empty
unit. Then we went out and bought a 9" TV/VCR combo to go into it (Sam's Club, $189).
It may not look like a
lot was done, but this was two days of cutting, measuring and then reattaching the vinyl covering. The TV runs on AC or DC
so we can slide it out easily to use on a rainy night while in the pop up. The big compartment, which used to hold the vcr
is now open for storage.
  |
 |
|
Privacy curtain- Sedona and Utah

Porta Potty Curtain- This is a regular fabric shower curtain. We purchased an RV curtain rod at our local dealer along with
the "tape". I sewed the tape to the curtain and Blaise hooked it up. It also makes a nice changing room, with privacy.
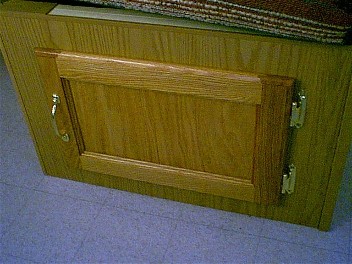
Under Bench Access Doors- Sedona
|
|
|
Under Seat Doors- Coleman doesn't give you this option on the lower end units. So, we found some hardwood doors and Blaise
cut openings in the paneling under the seats and attached the doors. Now we can store things in there without having to lift
the cushions, or, better yet, when the trailer isn't open- we can still get these doors open and slide cargo in.
Deeper Galley- Sedona
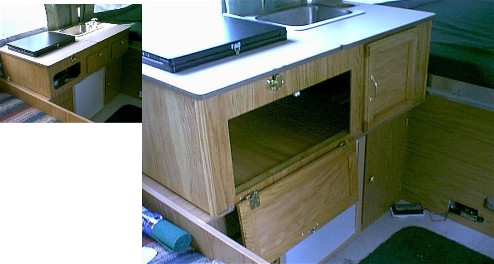
The top of the galley on the Destiny Series are only 9" tall (small pic). With both Blaise and I being taller people,
we decided that the galley needed to be deepened. First we switched the side that the stove was on. On the 2000 model, the
stove is over near the king size bunk. Blaise thought this to be a fire hazard (Coleman switched the sink and stove placement
in 2001).
We bought a piece of oak paneling and built a 14" deep box for the galley top. We purchased two
more doors ($3.00 a piece at a bargain lumber yard). Coleman gives you plenty of extra length on the sink drain hose. We switched
the propane hose side for the stove.
Now we have a lot more space under the sink and stove. We're looking into
a deeper sink, higher faucet and some sliding plastic bins to put in under the stove.
Waste Not......
....just in case you were wondering what we did with the old galley box.....
Blaise put a lid on it and put it in
the Astro van. Now it holds blankets, jumper cables and all kinds of other things. Since he uses the van for his contracting
business, he also puts his other tool boxes on top of this box. To test the strength of the box and lid he had himself and
the two kids stand on it, a total of about 365 lbs.
The lid is 1/2" plywood, sanded, stained and the edges are
done with the iron on real wood trim, found at Home Depot.
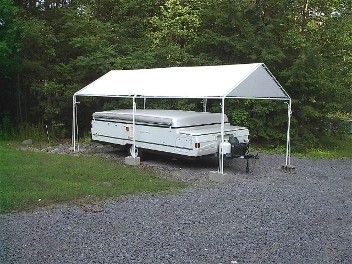
Inexpensive auto canopy. This is temporary until we pave the driveway (1 week!)
and get the camper up to the garage.
|
|
|
|
|