|
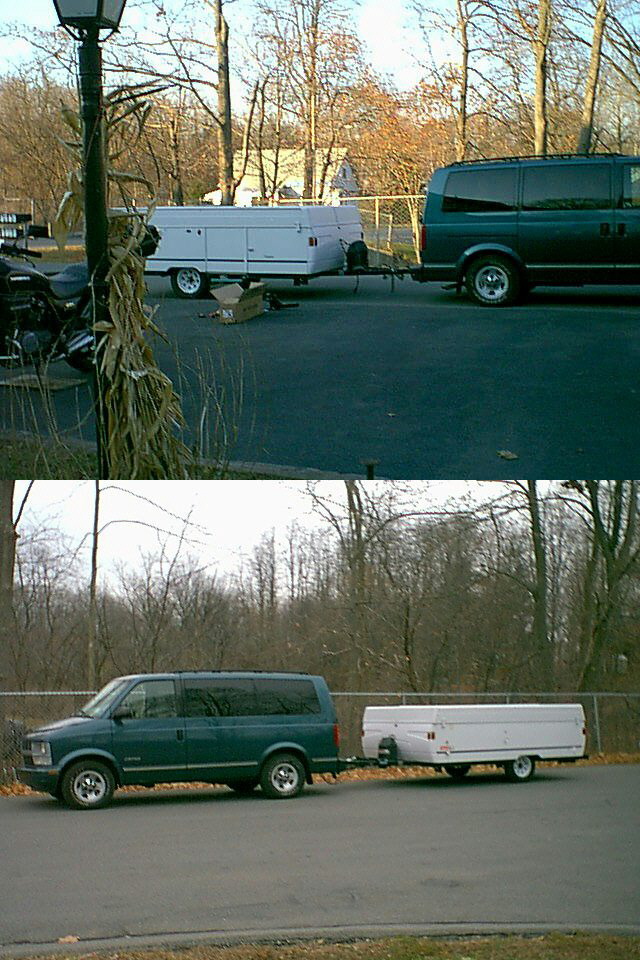
This is a "before" and "after" shot of our camper and van. The top picture is before the installation
of the Reese Mini 350 WDH.
This page will show the installation of our Reese Mini 350 WDH on our 1997 Chevy Astro van.
We decided on this hitch
because of the rear "sag" on the van with the trailer hitched to it. We previously towed the camper with a Dodge
Dakota, but the kids got too big for the seat in the extended cab and we decided to purchase the Chevy Astro.
With
a shorter wheel base on the van, we noticed that the whole assembly tended to sag. After looking through the posts on Pop
Up Times (www.popuptime.com) message boards about this Reese hitch, we decided it was the way we wanted to go.
The
hitch is supposed to come with anti-sway built into it. Since we tow a 10' camper, our sway problems may not be as noticeable
as with a 12' camper. But, since we are going to be taking some very long trips with the camper, we felt it was necessary
for our own safty to have this hitch.
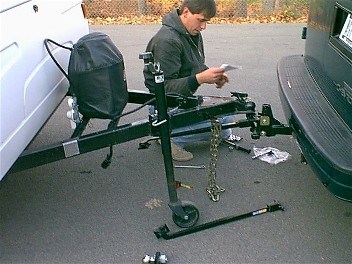
Blaise reading through the instructions and getting ready to start the installation of the hitch. This was at 3:30pm in late
November, so he didn't have much sunlight left to work in.

After measuring and putting the special brackets on the trailer frame (these brackets are provided in Reese Mini 350
model #66041 for Coleman/Fleetwood Trailers), he checks out the bars to make sure of his measurements. These bars will sit
on the friction pads on top of the bracket when the trailer is hitched. The model 66041 is made so the hitch will clear
the dolly wheel on Coleman/Fleetwood trailers.
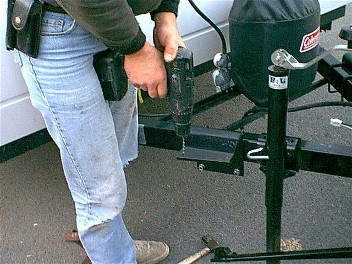
Blaise drill the holes in the bracket that will hold the friction pads onto the bracket. These pads allow the friction bars
to move back and forth on them. He drilled the holes with a 16.8v Black and Decker cordless drill. It took only a few minutes
to do the drilling for the entire project.
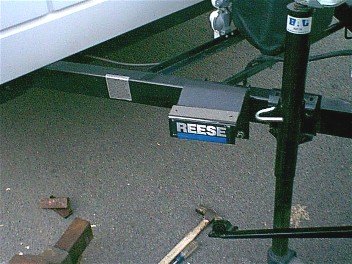
This is the bracket with the friction pad mounted on it. Blaise made counter sink holes for the screws. Be careful not to
drill out too much of the friction pad material.
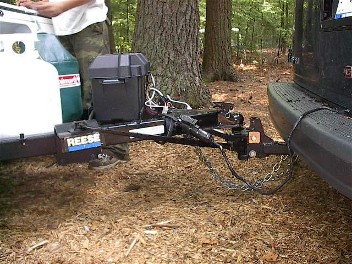
The Reese all hooked up and ready to go.

Although the before and after pictures aren't that dramatic, we can see a very distinct difference in the way the van
rear end is no longer sagging. Blaise carries a lot of heavy tools in the back of the van and it may still sag a bit, until
we either get better shocks or air bags for it. But, overall, we do see a difference.
The entire installation took
1.5 hours. It went very quickly and easily. To hitch the camper to the van, we raise the back of the van. We are lucky to
have a rounded curb in front of our home to do this with. We will also take something to get the van back up higher when we
are camping, to hook the hitch back up again. The friction bars can be a bit difficult to get up onto the brackets, but, with
a little experimenting, Blaise thinks he has a method down fairly well. We think it will get easier the more we do it.
NOTE: Good thing we got the Reese, because, with the purchase of the 2002 Utah, the WDH was essential.
|